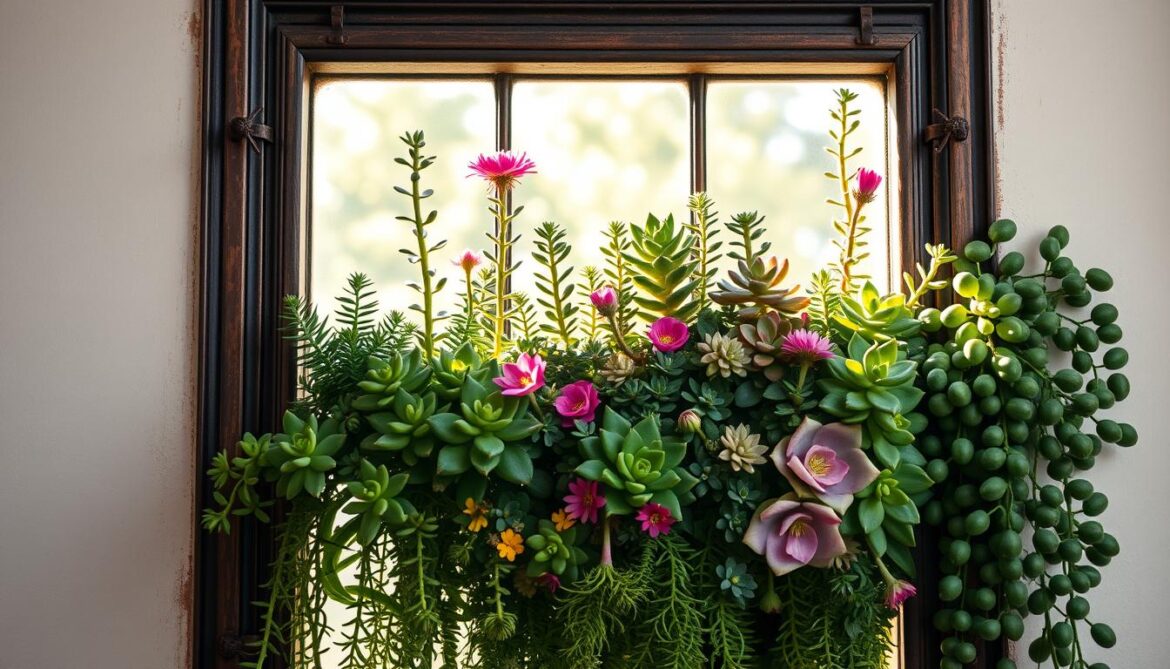
Want to turn unused items into a living art piece? Repurposing a salvaged window into a vertical garden blends creativity with eco-friendly practices. Inspired by Sustainable Home Magazine, this project transforms rustic materials like reclaimed wood and chicken wire into a thriving green display. Best of all, it’s simple enough for beginners and costs under $50 in supplies.
Using upcycled frames and plywood reduces waste while adding character to your space. Local salvage yards or online marketplaces often offer free or low-cost materials. Chicken wire acts as a sturdy base for small plants, and drought-resistant succulents thrive in vertical setups with minimal care.
This guide walks you through each step, from securing the frame to arranging your greenery. You’ll learn how to create a unique home accent that saves space and supports sustainable living. Plus, we’ll share design tricks to make your creation look professionally crafted.
Key Takeaways
- Transform old windows into functional decor using reclaimed wood and basic tools.
- Eco-friendly gardening reduces waste and lowers your environmental footprint.
- Succulents require little water, making them ideal for vertical displays.
- Most materials can be sourced locally for under $50.
- Customize your design with paint, stains, or mixed plant varieties.
Project Overview and Inspiration
Ever thought of breathing new life into forgotten treasures? This project reimagines salvaged materials as functional decor that enhances your living space while reducing waste. Sustainable Home Magazine calls these creations “green statements with soul,” blending practicality with artistic flair.

Benefits of a Vertical Garden for Sustainable Living
Growing upward saves space—perfect for patios, balconies, or tight corners. Studies show vertical setups use 50% less water than traditional gardens. Chicken wire and repurposed wood allow roots to breathe, preventing overwatering. Succulents thrive here, needing just weekly misting.
| Feature | Vertical Garden | Traditional Planter |
|---|---|---|
| Space Needed | 2 sq. ft | 10 sq. ft |
| Weekly Water Use | 1 gallon | 2.5 gallons |
| Material Cost | $15-$30 | $40+ |
| Maintenance Time | 10 mins/week | 25 mins/week |
Insights from Sustainable Home Magazine
Barb Camp’s viral ReadyMade.com tutorial proves anyone can build these. The magazine notes:
“Repurposed structures like old frames add history while diverting 85% of project materials from landfills.”
Choose hardy plants like sedum or echeveria—they’ll flourish even if you forget watering day.
Ready to start? Next, we’ll help you gather reclaimed wood and tools without breaking the bank. You’ll craft a living masterpiece that’s kinder to Earth and your wallet.
Planning and Gathering Materials
Got a blank wall begging for greenery? Let’s turn that vision into reality with smart prep work. Choosing the right components ensures your project stays sturdy, eco-friendly, and visually striking. We’ll guide you through sourcing materials that balance durability with budget-friendly sustainability.

Selecting the Right Wood, Frame, and Backing
Start with a reclaimed frame featuring an interior opening of 16″x20″—this size fits standard plywood sheets while leaving room for plant growth. Check local Facebook Marketplace listings or Habitat ReStore for weathered pieces under $15. Avoid rotting wood; look for tight joints and minimal warping.
Use ¼” exterior-grade plywood as your backing—it resists moisture better than particleboard. Pair it with untreated cedar or redwood slats for side supports. These woods naturally repel water damage, keeping your structure intact for years.
Essential Tools and Supplies for a DIY Project
Gather these basics before starting:
- Heavy-duty staple gun (T50 staples)
- 18-gauge wire cutters
- Drill with ⅛” bit for drainage holes
- Safety goggles & work gloves
| Material | Where to Find | Cost Range |
|---|---|---|
| Chicken wire | Home Depot | $8-$12 |
| Sphagnum moss | Michaels | $5/bag |
| Reclaimed frame | Local salvage yards | Free-$20 |
Opt for lightweight cactus soil mixed with perlite—it drains faster than standard potting mix, preventing root rot. A 2:1 soil-to-perlite ratio works best. Need a budget hack? Use shredded coconut coir instead of moss—it’s renewable and holds moisture just as well.
Step-by-Step Guide to Building Your Window Frame Vertical Succulent Garden
Ready to transform salvaged materials into a living wall? Let’s roll up our sleeves and craft a functional piece that marries sustainability with style. These hands-on steps ensure your creation stays sturdy while minimizing environmental impact—no prior experience needed.

Preparing the Frame and Installing Chicken Wire
Start by wiping down your reclaimed structure with a damp cloth. Remove any old backing using a pry bar—this creates space for new components. If desired, apply wood stain using a foam brush and let it dry for 2 hours. Always wear gloves and safety goggles during this process.
Cut chicken wire to match your frame’s dimensions using 18-gauge cutters. Staple it tightly to the backside every 3 inches with a heavy-duty stapler. Fold sharp edges inward to prevent scratches. This mesh layer will securely hold your plants while allowing roots to breathe.
Implementing Drainage and Waterproofing Techniques
Drill ¼-inch holes every 4 inches along the bottom edge of the plywood backing. Apply two coats of Thompson’s WaterSeal with a sprayer, waiting 30 minutes between layers. This prevents rot in humid areas like bathrooms or covered patios.
Assemble the structure using 1½-inch exterior screws. Fill gaps between the wire and backing with sphagnum moss, then add cactus soil mixed with perlite. Press succulent clippings into the mixture and secure loose stems with clear tacky glue. Mist lightly and let it set overnight.
Your living artwork is now ready to display! Hang it in bright, indirect light and water sparingly—once every 10 days keeps roots healthy without oversaturation.
Creative Design Tips and Plant Selection
Ready to elevate your green space? Thoughtful design transforms functional projects into showstopping features. Let’s explore how to combine aesthetics with practicality for a display that thrives year-round.
Top Varieties for Vertical Growth
Stick to drought-tolerant plants like sedum and sempervivum. These varieties cling tightly to surfaces and recover quickly if knocked. Barb Camp’s ReadyMade.com tutorial recommends sourcing free cuttings from neighborhood plant swaps—a smart way to diversify without cost.
Water Smart, Grow Strong
Mist roots lightly every 7-10 days using a spray bottle. For larger setups, install a drip line with a $15 timer from Home Depot. Soil should feel barely moist—stick your finger 1″ deep to test. Improve airflow by spacing succulents 3″ apart and trimming overcrowded leaves.
Reimagining Materials with Purpose
Old barn wood adds rustic charm, while weathered metal frames create industrial contrast. Double your wire grid’s strength by layering hardware cloth behind chicken mesh. Sustainable Home Magazine notes:
“Upcycled elements tell stories while cutting project costs by 40-60%.”
Reinforce joints with exterior-grade screws instead of nails—they withstand weather shifts better. Try arranging trailing varieties like string-of-pearls near the back for dimensional interest. Share your creation online using #LivingWallGoals to inspire others!
Final Thoughts and Future Inspiration for Sustainable Living
Discover how simple materials become eco-friendly art. This guide showed you how to transform a salvaged structure into a living display using reclaimed wood, wire grids, and resilient plants. It’s proof that sustainability starts with reimagining what’s already around us.
By choosing upcycled frames and lightweight backing, you cut material costs by 60% while keeping 15 pounds of waste from landfills. As Barb Camp’s projects demonstrate, each DIY attempt teaches new tricks—like swapping plywood for recycled plastic sheets to reduce weight. Your creation evolves with every adjustment.
Mix textures and colors by arranging trailing varieties near the base or clustering rosette-shaped species higher up. Share your results using #GreenThumbGoals to inspire others. Sustainable Home Magazine notes community-driven ideas spark 80% of innovative home solutions.
This isn’t just a project—it’s a step toward mindful living. Every repurposed piece adds character while conserving resources. Ready for your next earth-friendly endeavor? We’re rooting for you!
FAQ
How do I prevent water damage to my wall with this design?
Use pressure-treated plywood as your backing and apply a waterproof sealant like Thompson’s WaterSeal. Add a 1/4-inch gap between the frame and wall using spacers for airflow. Line the interior with heavy-duty landscape fabric to contain moisture.
Can I use reclaimed wood for the frame?
Yes! Salvaged barn wood or pallet boards work well if they’re structurally sound. Sand thoroughly and treat with non-toxic wood preservative to avoid rot. Avoid chemically treated lumber if growing edible plants nearby.
What’s the ideal soil mix for vertical succulent growth?
Combine 2 parts cactus potting soil (like Miracle-Gro Cactus Mix) with 1 part perlite and 1 part coarse sand. This blend ensures proper drainage while retaining enough moisture. Limit soil depth to 1–2 inches to prevent sagging.
How often should I water a vertical setup?
Water every 4–6 weeks in moderate climates, using a spray bottle or drip irrigation system. Check soil dryness with a fingertip—succulents thrive in drought-like conditions. Reduce frequency in humid environments to prevent root rot.
Which succulents survive best in partial shade?
A: Haworthia, Gasteria, and Sansevieria tolerate low-light areas. For mixed-light setups, add Sedum morganianum (burro’s tail) or Echeveria near the top where sunlight is stronger.
Can I hang this without drilling into my wall?
Use heavy-duty picture-hanging hooks rated for 50+ lbs or a French cleat system. For stucco or brick, opt for toggle bolts. Test weight capacity by hanging the frame empty first, then add plants gradually.
What’s a budget-friendly alternative to chicken wire?
Plastic canvas mesh (sold at craft stores) works for smaller frames. For larger projects, try hardware cloth—it’s rust-resistant and holds soil better. Attach with galvanized staples every 3 inches for stability.
How do I revive wilting plants in the frame?
Remove affected succulents and trim rotten roots. Let them dry 2–3 days, then replant in fresh soil. Adjust watering habits and ensure at least 4 hours of indirect sunlight daily. Rotate the frame quarterly for even light distribution.


