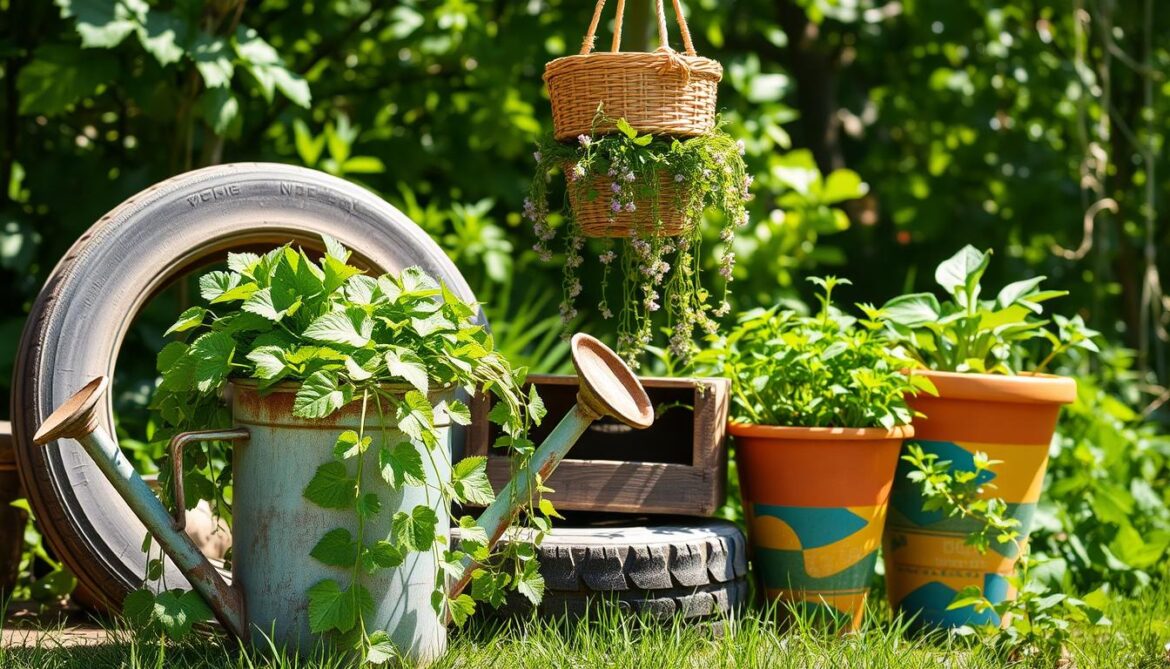
Do you remember that rusty colander in your garage? Or the cracked ceramic teapot you can’t throw away? I turned these items into thriving herb planters for my kitchen. This is the magic of upcycled gardening – where creativity and conservation meet.
When I started sustainable gardening, I was impressed by its simplicity and rewards. By using items meant for the trash, we create unique gardens. This also helps reduce waste and benefits our planet.
Research in Sustainable Home Magazine shows that gardeners save $300-500 a year by using old items. This means more money for you and a garden that reflects your story!
The charm of eco-friendly gardening is its ease of access. You don’t need expensive tools or years of gardening to start. Whether you have a big backyard or a small balcony, these green gardening techniques can be done by anyone, anywhere.
Key Takeaways
- Upcycled gardening turns old items into beautiful garden pieces
- Home gardeners can save $300-500 a year by repurposing
- No special experience or big budget needed to start
- Sustainable gardening saves money and helps the environment
- Creative repurposing shows your style and reduces waste
- Even small spaces can have upcycled garden projects
Getting Started with Upcycled Gardening
Before starting upcycled garden projects, it’s important to know the basics. Upcycled gardening is more than just being creative with old items. It’s about turning everyday objects into places where plants can grow.
With some knowledge and simple tools, you can make trash into garden treasures.
Benefits of Container Gardening with Repurposed Items
Container gardening with recycled materials is very flexible. You can put your repurposed gardening containers anywhere. This is great for people living in cities with little space.
One big plus is controlling the soil. Unlike in-ground gardens, you can make the perfect soil for each plant in containers.

Upcycling for gardens helps the environment a lot. Just 10 containers can keep 20-30 pounds of waste out of landfills. This is like reducing your household waste by nearly 5% every year.
It also saves money. Store-bought planters cost $15-50 each. But, you can find or make containers for free or very cheap. A family can save $100-300 on containers alone.
Essential Tools for Upcycled Container Gardens
Most tools you need for diy garden projects you probably already have. Here’s what you’ll need:
- Drill with bits – Essential for creating drainage holes in plastic, metal, or wooden containers
- Hammer and nails – Useful for wooden container construction and creating drainage holes in metal
- Pruning shears – For trimming plants and cutting softer materials
- Utility knife – Perfect for cutting plastic containers and making precision cuts
- Sandpaper – To smooth rough edges that could damage plants or cause injury
You’ll also need basic gardening supplies. These include good potting soil, organic fertilizer, and tools for watering. For more complex projects, add wire cutters, a saw, and waterproof sealant to your tools.
Drainage Considerations for DIY Containers
Drainage is key for recycled plant containers. Without it, roots rot in waterlogged soil. Every container needs drainage holes.
For plastic containers, use a drill with a 1/4 to 1/2 inch bit to create several holes in the bottom. Work slowly to prevent cracking. With metal containers, start with a nail and hammer to create a pilot hole, then widen with a drill. For wooden containers, drill 1/2 inch holes spaced about 4-6 inches apart.
Beyond holes, adding a drainage layer helps. Place a 1-inch layer of gravel, broken pottery pieces, or even wine corks at the bottom of deeper containers before adding soil. This creates space for excess water to collect away from roots.
“The single biggest mistake in container gardening is inadequate drainage. No matter how perfect everything else is, without proper drainage, your plants are doomed.”
Selecting Appropriate Plants for Container Growing
Not all plants do well in containers. Choosing the right plant for your upcycled container is crucial. Consider these factors when picking plants:
| Container Size | Container Depth | Ideal Plant Types | Examples |
|---|---|---|---|
| Small (under 6″) | Shallow (2-4″) | Succulents, small herbs | Thyme, chives, echeveria |
| Medium (6-12″) | Medium (5-8″) | Most herbs, leafy greens | Basil, lettuce, spinach |
| Large (12″+) | Deep (8″+) | Root vegetables, shrubs | Carrots, tomatoes, peppers |
Container material affects plant choice. Dark-colored metal containers heat up quickly, good for tomatoes and peppers. Wooden containers hold moisture longer, perfect for lettuce and herbs.
Think about light conditions too. Full sun needs sun-loving plants. Shadier spots need shade-tolerant varieties. Upcycling techniques let you create special environments for different plants.
Container plants need more water and fertilizer than in-ground plants. Choose self-watering designs for thirsty plants. Group containers with similar water needs for easier care.
With these basics, you’re ready to start your upcycled container garden. The next sections will guide you through projects using kitchen items, furniture, and industrial materials.
Kitchen Item Transformations
Turn ordinary kitchen items into amazing garden containers with these creative ideas. Your kitchen cabinets likely have items that can be turned into charming planters. This saves money and reduces waste. These items add unique character that store-bought containers can’t match.

Using kitchen items for gardening is a key part of sustainable gardening. These projects keep items out of landfills and offer budget-friendly solutions for gardeners of all levels.
Coffee Can Herb Gardens
Coffee cans are perfect for growing herbs, great for small spaces. A 12oz coffee can is just right for herbs like basil, mint, or cilantro.
Here’s how to make your own coffee can herb garden:
- Clean thoroughly – Remove labels and wash cans with hot, soapy water to eliminate coffee residue and adhesive.
- Create drainage – Use a hammer and nail to punch 4-5 holes in the bottom of each can.
- Sand rough edges – Smooth any sharp edges with sandpaper to prevent injuries.
- Apply primer – Cover the exterior with a metal-specific primer to prevent rusting.
- Paint decoratively – Use exterior acrylic paints that resist weather damage. Look for non-toxic, water-based options that are safe for food-growing environments.
- Add drainage material – Place a layer of small stones or broken pottery pieces at the bottom.
- Plant your herbs – Fill with potting soil and add your favorite herb seedlings.
Group your coffee can herbs by water needs. Rosemary and thyme like dry conditions, while basil and mint need more water. This makes caring for them easier in your urban garden.
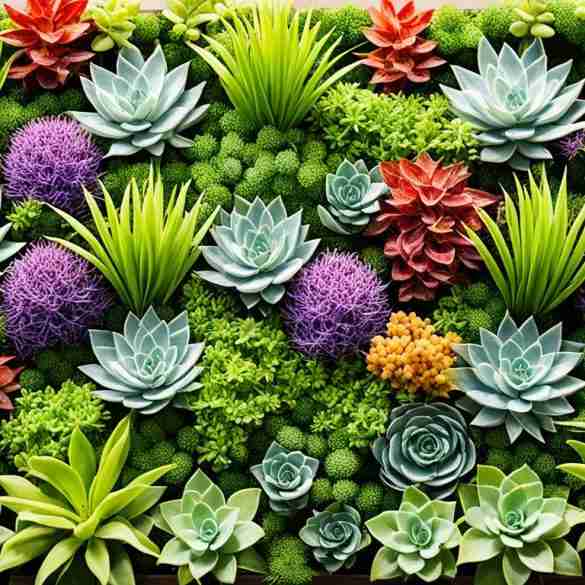
Tea Tin Succulent Displays
Decorative tea tins can become charming homes for succulents. Their shallow depth is perfect for plants with small root systems. This creates beautiful displays that need little care.
Tea tins are great for these succulent varieties:
- Echeveria – These rosette-shaped succulents come in various colors and stay compact.
- Haworthia – Striped, spiky plants that tolerate low light conditions.
- Sedum – Trailing varieties add visual interest as they cascade over the edges.
- Crassula – Including the popular jade plant, these grow well in small containers.
To prepare your tea tin, drill 2-3 small drainage holes in the bottom. Add a thin layer of activated charcoal before your cactus soil mix. This keeps the soil fresh in these small containers. Water sparingly—about once every 10-14 days for most succulents.
These miniature gardens are perfect for windowsills or as handmade gifts. A collection of different tea tin varieties creates an impressive arrangement that showcases your creative container gardening skills.
Colander and Strainer Planters
Colanders and strainers have built-in drainage, making them great for container gardening. This feature is perfect for plants that dislike soggy roots, such as herbs and alpine strawberries.
The mesh or perforated design allows excellent airflow to the root system while preventing soil from washing away. To retain more soil, line your colander with a layer of coconut coir or sphagnum moss before adding potting mix.
Colanders and strainers can be displayed in several creative ways:
- Hanging displays – Attach chains or macramé hangers to create suspended gardens that save up to 4 square feet of counter or floor space.
- Tiered arrangements – Stack colanders of decreasing sizes on a central pole for a vertical garden effect.
- Tabletop centerpieces – Fill with colorful annuals for an instant decorative element.
- Wall-mounted collections – Secure to fence posts or walls for an artistic garden installation.
Colorful enamel colanders from thrift stores add a vintage touch to your garden space. Metal versions develop an attractive patina over time, while plastic options provide lightweight alternatives for balcony gardens. This versatility makes them perfect for upcycled garden ideas in any setting.
Mason Jar Indoor Herb Gardens
Mason jars offer transparency that store-bought planters can’t match—allowing you to observe root development and soil moisture levels. This visibility makes them excellent teaching tools for children learning about plant growth.
But glass containers present unique challenges for plant health. Without proper drainage, roots can quickly rot in these enclosed environments. Here are solutions to make mason jar gardens thrive:
- Create a drainage layer with 1-2 inches of pebbles at the bottom of each jar.
- Add a tablespoon of activated charcoal above the pebbles to filter water and prevent odors.
- Install a simple water-level indicator using a popsicle stick marked with a “minimum” and “maximum” line.
- Choose moisture-loving herbs like mint, cilantro, and parsley that adapt well to these conditions.
For a cohesive look, group mason jars of different sizes on a sunny windowsill. You can enhance their appearance by wrapping twine around the neck of each jar or adding decorative labels identifying each herb.
| Kitchen Container | Best Plant Types | Drainage Solution | Maintenance Level | Cost Savings |
|---|---|---|---|---|
| Coffee Cans | Individual herbs, small flowers | Drilled holes | Low | $3-5 per container |
| Tea Tins | Succulents, air plants | Small drill holes | Very low | $4-8 per container |
| Colanders | Mixed herbs, strawberries | Built-in | Low-Medium | $5-12 per container |
| Mason Jars | Moisture-loving herbs | Rock layer | Medium | $2-4 per container |
The financial benefits of kitchen item transformations are huge. A complete herb garden using repurposed containers costs about $15-20 in soil and plants. This is a 60-70% savings compared to buying new containers. These creative containers also add personality and conversation pieces to your home that mass-produced options can’t provide.
By embracing these kitchen item transformations, you’re not only practicing sustainable gardening but also creating unique expressions of your personal style. Each repurposed container tells a story while providing a practical growing space for your plants.
Furniture Repurposing Projects
Give old furniture a new life by turning it into beautiful garden displays. Every year, 9.8 million tons of furniture end up in landfills in the US. By upcycling, you create unique garden features and help the environment. Let’s explore how to give old furniture a new purpose.
Dresser Drawer Garden Beds
Old dresser drawers are great for making raised garden beds. They can hold up to 9 square feet of plants. This is perfect for flowers, herbs, or small vegetables.
To start, remove hardware and sand the edges. Then, apply a non-toxic sealant like linseed oil or beeswax. This protects the wood and keeps plants safe.
Drill 4-6 half-inch holes in the bottom for drainage. Add small rocks or broken pottery before the soil. This helps water drain better.
- Arrange drawers in a staggered way for a nice look
- Soil-filled drawers can be heavy, so be careful
- Place larger drawers on the ground and smaller ones up high
- Adding casters makes them easier to move

Bookshelf Vertical Growing Systems
An old bookcase can become a vertical garden. It can hold 15-20 plants in just 2-3 square feet. This is great for small spaces.
Strengthen each shelf to hold soil and plants. Add 1×2 strips or replace the thin backing with plywood. Paint or seal the wood to protect it from moisture.
Use small containers or dividers on each shelf. Or, line shelves with landscape fabric for a clean look. Place your bookshelf garden against a wall or secure it to prevent it from tipping.
- Put bigger plants on the bottom and smaller ones up top
- Group plants by their water and light needs
- Use small grow lights for plants that need more light
- Install a drip irrigation system for easy watering
Old Chair Planter Conversions
Wooden or wicker chairs can become charming planters. You can make three different types of chair planters.
For seat-only planters, remove cushions and line the seat with landscape fabric. Fill with potting mix and plant trailing flowers. This works best with solid seats.
Full chair planters use the whole chair. Remove the seat and attach chicken wire or hardware cloth. Line with coco fiber or moss, then fill with soil and plants. Succulents, sedums, and small perennials are good choices.
Hanging chair planters are for chairs with broken legs. Remove the legs and hang the seat from a tree or porch. These planters add interest and save space.
Vintage Suitcase Fairy Gardens
Turn old suitcases into whimsical fairy gardens. These mini landscapes are perfect for fairy garden accessories and give old luggage a new life.
Drill drainage holes in the bottom and apply waterproofing spray. Line the inside with plastic sheeting and add activated charcoal to prevent odors. Fill with lightweight potting mix.
Choose miniature plants that fit the scale of your garden. Dwarf ferns, baby tears, Irish moss, and miniature African violets are good choices. Add tiny accessories to complete your fairy garden.
With proper care, these gardens can last 3-5 years outdoors. Seal the suitcase annually to protect it. For year-round enjoyment, move it indoors during harsh weather.
“Repurposing furniture for gardening is the perfect blend of creativity and sustainability. Each piece tells a story while giving new life to items that would be discarded.”
These projects offer endless creative possibilities and reduce waste. Start with one project and watch your garden come to life. Upcycling adds unique character to your outdoor space.
Industrial Container Gardens
Industrial container gardens add a rustic charm to your outdoor space. They give new life to materials headed for landfills. These containers are durable and have a unique character that store-bought planters can’t match.
By repurposing industrial items, you’re not just creating unique garden features. You’re also participating in sustainable horticulture that keeps valuable resources in circulation.
Each repurposed wooden pallet saves about 3-5 pounds of wood from landfills. Metal containers can be garden elements for decades with proper care. Let’s explore how to transform these industrial cast-offs into productive growing spaces.
These spaces combine functionality with industrial-chic style.
Wooden Crate Vegetable Gardens
Wooden crates are great for vegetable gardening. They offer mobility and rustic appeal. The depth of your crate determines what you can grow successfully:
- Leafy greens and herbs require 6-8 inches of soil depth
- Most vegetables thrive in 8-10 inches
- Root vegetables need 12-14 inches for proper development
To extend the lifespan of wooden crates, proper reinforcement and treatment are key. Start by lining the interior with landscape fabric for soil retention and drainage. Then, apply a food-safe wood sealer to the exterior surfaces only.
For structural integrity, reinforce corner joints with metal brackets. Add a layer of gravel at the bottom before filling with organic potting mix. This creates ideal growing conditions while preserving the crate’s character.
“Wooden crates have become my go-to for growing vegetables in small spaces. Their rustic appearance adds character to my garden, and with proper preparation, they’ve lasted for years despite constant exposure to the elements.”
When planting, consider companion planting techniques to maximize your harvest. Pair shallow-rooted plants like lettuce with deeper-rooted vegetables like carrots. This efficiently uses all available space—a key principle in organic gardening.
Metal Bucket Flower Displays

Metal buckets and containers are durable for outdoor gardening. But they need special preparation to prevent rust and ensure plant health. Before planting, address these key considerations:
- Drill 4-5 drainage holes in the bottom using a metal bit
- Apply rust-inhibiting primer to extend container life
- For edibles, use food-safe sealants on interior surfaces
- For decorative containers, consider weather-resistant paint that can withstand outdoor conditions for 5+ years
Metal containers heat up more quickly than other materials. This affects watering needs. During summer months, expect to water 20-30% more frequently than plastic or ceramic containers. This heat retention makes metal buckets ideal for heat-loving plants like:
- Succulents and cacti
- Mediterranean herbs (rosemary, thyme, lavender)
- Heat-tolerant annuals like zinnias and marigolds
Create striking displays by grouping metal containers of varying heights and sizes. The industrial aesthetic pairs beautifully with colorful blooms. This creates a compelling contrast that enhances your upcycled garden decor.
Upcycled Barrel Garden Projects
Wooden and plastic barrels offer versatile options for creating substantial garden features. Their large volume makes them perfect for growing multiple plants or creating specialized garden elements. Here are three popular barrel transformation projects:
| Project Type | Materials Needed | Plant Capacity | Space Required |
|---|---|---|---|
| Half-Barrel Planter | Barrel, saw, drill, landscape fabric | 6-8 medium plants | 3 sq. ft. |
| Barrel Pond Garden | Barrel, pond liner, aquatic plants | 3-4 water plants | 4 sq. ft. |
| Strawberry Barrel Tower | Barrel, drill, PVC pipe, potting soil | 20-25 strawberry plants | 2 sq. ft. |
For the strawberry barrel tower, cut 3-inch holes in staggered rows around the barrel’s circumference. Insert plants through these openings, and create a central watering column using PVC pipe with drilled holes. This design maximizes growing space while ensuring all plants receive adequate moisture.
When working with wooden barrels that previously held spirits or wine, the residual aroma can add a pleasant scent to your garden space—a delightful bonus to your green living project. Just ensure any barrel used for growing edibles was not previously used for chemicals or toxic substances.
Tire Stack Growing Systems
Tire stack gardens transform problematic waste into productive growing spaces. A single tire stack can produce 25-30 pounds of potatoes annually. This makes it an excellent option for maximizing food production in limited space.
When selecting tires for gardening with recycled materials, follow these safety guidelines:
- Use only passenger vehicle tires (avoid large truck or industrial tires)
- Choose tires manufactured after 2000 when possible
- Avoid tires with visible wire or excessive wear
- Clean thoroughly before use to remove road debris
To prepare tires for planting, scrub them with a mixture of dish soap and water, then rinse thoroughly. For added peace of mind, paint the interior with non-toxic latex paint to seal the rubber surface and prevent potential leaching.
Creating a potato tower is one of the most productive uses for tire stacks. Start with a single tire on well-prepared soil, fill with compost-rich potting mix, and plant seed potatoes. As plants grow 8-10 inches tall, add another tire and more soil, covering all but the top few inches of foliage. Continue stacking and filling until you reach 3-4 tires high.
Beyond potatoes, tire stacks work well for growing pumpkins, squash, and other sprawling plants that can cascade down the sides. The black rubber absorbs heat, creating a warm microclimate. This extends the growing season by up to two weeks on either end—a significant advantage for sustainable horticulture in cooler climates.
Hanging and Vertical Container Solutions
Hanging and vertical gardening solutions change urban gardening by using spaces like walls and fences. They are perfect for those with little yard space. These methods make your garden bigger and look amazing.
Thinking vertically opens up new ways to grow food and flowers in small spaces. Let’s look at smart ways to make hanging and vertical gardens from things you might have at home.
Shoe Organizer Vertical Gardens
That shoe organizer in your closet can become a garden. It’s great for herbs, lettuce, and strawberries.
Mounting it right is key because it can weigh 35-45 pounds. Use toggle bolts for drywall and masonry anchors for brick or concrete. Always attach to studs or solid surfaces.
A 24-pocket organizer can feed a family of four for 3-4 months. Put bigger plants like mint in the bottom and lighter ones like chives in the top.
Plant Pairing Suggestions for Shoe Organizers:
- Upper pockets: Microgreens, lettuce, radishes, chives
- Middle pockets: Cilantro, basil, parsley, strawberries
- Lower pockets: Mint, oregano, thyme, trailing nasturtiums
Plastic Bottle Hanging Planters
Plastic bottles are great for zero-waste gardening. Cut them up to make planters. A 2-liter bottle is good for small plants, and a gallon jug is better for bigger ones.
Choose #1 PET or #2 HDPE bottles for food-growing. Avoid bottles that held chemicals or cleaning products.
To protect from sunlight, use UV-resistant bottles or paint them with non-toxic paint. This makes your planter last longer and look good.
Three Popular Bottle Planter Designs:
- Side-cut window planter: Cut a rectangular opening in the side, leaving the top intact for hanging
- Top-cut hanging planter: Cut the top third off, invert it to create a self-watering reservoir
- Vertical bottle garden: Cut small planting holes along the sides and hang horizontally
Gutter Garden Installation
Vinyl rain gutters are perfect for growing plants in narrow spaces. They can be hung on fences or walls for a linear garden. They’re great for lettuce, spinach, radishes, and herbs.
Mounting gutters right is important to avoid damage. Use brackets every 16-24 inches and make sure they’re on studs. Also, slope the gutters slightly for drainage.
Drill holes every 6-8 inches for drainage. Cover them with mesh to keep soil in. A 10-foot gutter can grow 15-20 lettuce plants or 8-10 herbs.
Weight Distribution Guidelines:
- Standard vinyl gutter (filled with soil and plants): 7-10 pounds per linear foot when wet
- Maximum recommended length without additional support: 8 feet
- Recommended mounting height: At least 6 inches below the supporting structure’s edge
Pallet Wall Garden Construction
Wooden pallets are great for vertical gardening. They offer a lot of space in a small area. A pallet garden can have 20-30 plants in just 8 square feet.
Choose pallets carefully. Look for the HT stamp, not MB, to avoid chemicals. Avoid pallets with oil stains or unknown origins.
Prepare your pallets well. Sand the edges and seal them with non-toxic paint. Use food-grade linseed oil or beeswax for protection.
You can plant between slats or in a fully enclosed box. The pocket method is good for herbs and flowers. The enclosed method is better for vegetables.
| Vertical Garden Type | Space Efficiency | Weight When Planted | Ideal Plants | Maintenance Level |
|---|---|---|---|---|
| Shoe Organizer | High (24 plants in 4 sq ft) | 35-45 pounds | Herbs, lettuce, strawberries | Medium (frequent watering) |
| Bottle Planters | Medium (1-3 plants per bottle) | 2-5 pounds each | Herbs, small flowers, succulents | Low (self-watering options) |
| Gutter Gardens | High (15-20 plants per 10 ft) | 70-100 pounds per 10 ft | Lettuce, spinach, radishes, herbs | Medium (drainage monitoring) |
| Pallet Gardens | Very High (20-30 plants per pallet) | 100-150 pounds when wet | Mixed vegetables, flowers, herbs | High (structural checks needed) |
Vertical gardening is great for city gardeners with little space. It turns everyday items into growing spaces. Whether it’s herbs in a shoe organizer or a pallet garden, these solutions bring gardening joy to small spaces.
Specialized Upcycled Gardens
Take your upcycled gardening to the next level by creating special systems. These systems serve specific needs while staying eco-friendly. They mix upcycling with targeted functionality.
Upcycled Self-Watering Container Systems
Turn plastic bottles into self-watering planters. Cut the top third off, flip it, and place it back in the bottom with soil. This method cuts down watering by up to 70% – great for those who are always on the go. For bigger containers, use old cotton t-shirts to make a wicking system. It pulls water up from a hidden reservoir.
Child-Friendly Container Garden Projects
Get kids excited about gardening with colorful rubber boot planters. Fill them with radishes that grow in just 3-5 days. Old toy boxes become mini raised beds for safe, edible plants like cherry tomatoes and strawberries.
Pet-Safe Upcycled Container Gardens
Use old step ladders with containers to keep pets away from plants. Choose safe herbs like basil and mint. Avoid toxic plants like lilies and aloe vera. Use recycled garden decor like smooth river stones to stop pets from digging.
Pollinator-Friendly Container Designs
A small 2×2 foot container garden can get 15-20 pollinator visits an hour. Arrange containers to make “pollinator highways” across your space. Upcycled teacups and shallow dishes can be water sources for thirsty bees.
Want to share your green gardening tips? Sustainable Home Magazine is looking for upcycled garden creations. Your ideas could inspire community gardens nationwide!
FAQ
Q: How much money can I save by using upcycled containers instead of buying new ones?
A: Upcycling can save you 60-70% on container costs. For example, a kitchen herb garden in upcycled containers costs -20. This is much less than the + for new containers. Home gardeners can save 0-500 a year by repurposing materials.
Q: Do I need special tools to create upcycled garden containers?
A: You likely already have the tools needed for upcycled gardening. You’ll need a drill, hammer, screwdriver, pruning shears, and scissors. For more complex projects, a saw might be helpful. But, many containers can be repurposed with little modification.
Q: How do I ensure proper drainage in upcycled containers?
A: Drill 4-6 holes (about 1/4 inch) in the bottom of most containers. For glass containers, use gravel or activated charcoal for drainage. Wooden containers need slightly larger holes (3/8 inch) to prevent clogging.
Q: Are there any materials I should avoid using for growing edible plants?
A: Avoid containers that held toxic chemicals or treated lumber. Also, steer clear of containers with lead-based paint. For plastic containers, choose #1, #2, #4, and #5 plastics for food plants.
Q: How do I know which plants will grow well in which upcycled containers?
A: Match plant root depth to container depth. Shallow containers are best for herbs and succulents. Medium containers work for most flowers and leafy greens. Deep containers are needed for root vegetables and larger plants. Metal containers heat up quickly, so they may need more water.
Q: How can I make my upcycled containers last longer outdoors?
A: Apply non-toxic sealants like linseed oil or beeswax to wooden items. Metal containers should be painted with rust-resistant paint. Plastic containers should be UV-resistant. Place containers in a spot with some shade and avoid extreme weather. With proper care, upcycled containers can last 3-5 years outdoors.
Q: What’s the environmental impact of upcycled gardening?
A: Upcycling 10 containers can divert 20-30 pounds of waste from landfills. Furniture upcycling has an even bigger impact, as the US sends 9.8 million tons of furniture to landfills annually. Container gardening also uses 30% less water than traditional gardening.
Q: How do I create self-watering containers from upcycled materials?
A: There are three main methods. The reservoir method uses inverted plastic bottles to slowly release water. The wicking method uses cotton rope or old t-shirts to draw water up. The overflow system connects multiple containers. These methods can save 60-70% on watering and conserve up to 30% more water than traditional methods.
Q: Are vertical gardens made from upcycled materials sturdy enough?
A: Yes, when built correctly. A planted shoe organizer can weigh 35-45 pounds, and a soil-filled pallet can exceed 100 pounds. Use the right anchors for your wall type. Make sure the weight is evenly distributed and check the mounting points regularly.
Q: How can I make upcycled gardening safe for children and pets?
A: Use non-toxic sealants and paints. For children’s gardens, avoid containers with sharp edges. Choose fast-growing plants like radishes and lettuce. For pet-safe gardens, research toxic plants and elevate containers. Add protective coverings to prevent digging and nibbling.
Q: How much growing space can vertical upcycled gardens provide?
A: Vertical gardening greatly increases growing space in small areas. A standard pallet garden can hold 20-30 plants in just 8 square feet. A 24-pocket shoe organizer can grow enough herbs and salad greens for a family of four for 3-4 months, using very little floor space.
Q: Can upcycled containers support pollinators and beneficial insects?
A: Absolutely! A 2×2 foot container garden can support 15-20 pollinator visits per hour. Group containers to create “pollinator highways.” Include a variety of flower shapes and colors. Avoid pesticides. Native flowering plants in upcycled containers provide essential habitat in urban areas.





1 comment
[…] Sustainable gardening practices […]