“The sun is the only safe nuclear reactor, situated as it is some ninety-three million miles away.” — Stephanie Mills, ecological activist and author
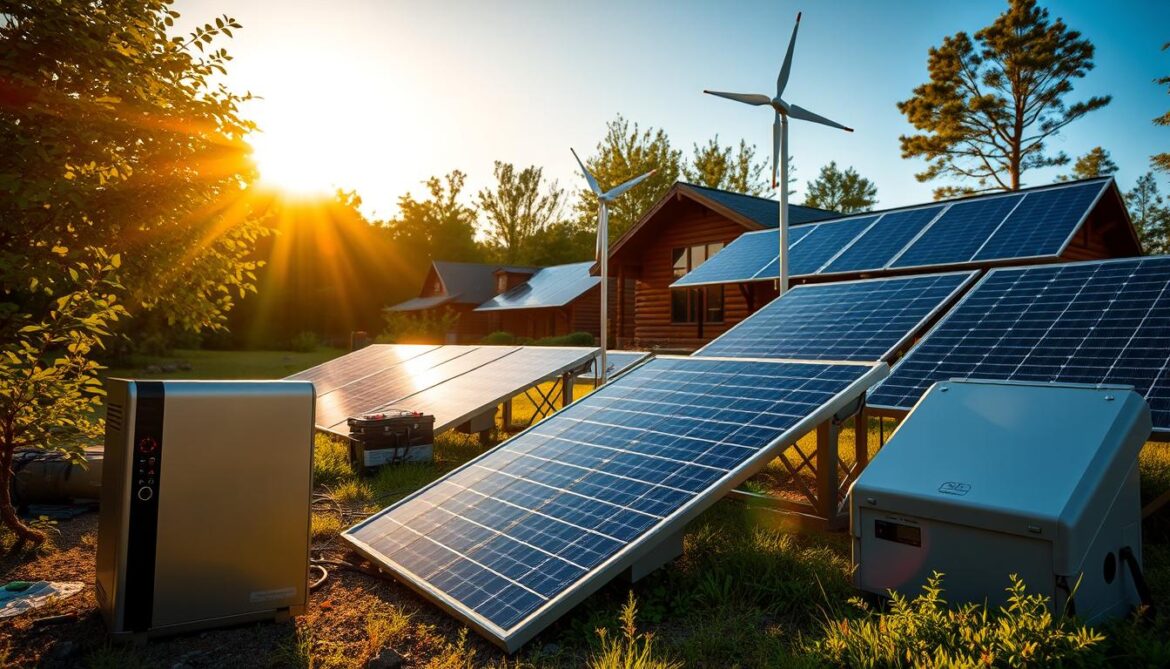
Imagine waking up every morning knowing your home is powered by clean energy you made yourself. This dream is real and within reach with renewable energy projects you can do yourself.
At Sustainable Home Magazine, we think everyone should have access to green power, no matter their background. Whether you’re new to this or have some experience, photovoltaic systems offer options that fit your skills and budget.
The savings are real: most home systems pay off in 7-10 years. They keep working for 25+ years after that. Making your own power also means you’re secure when the grid goes down and you’re helping the planet.
In this guide, we’ll show you how to start with solar energy projects. We’ll cover everything from simple charging stations to full home setups. We’ll make solar panel installation easy with clear steps, tool tips, and stories of success.
Key Takeaways
- Create energy independence with customizable solar solutions for any skill level
- Save thousands on utility bills with systems that pay for themselves in 7-10 years
- Reduce your environmental impact while increasing home resilience
- Start with small projects and scale up as your confidence grows
- Benefit from renewable technology that lasts 25+ years with minimal maintenance
- Learn practical skills that combine electrical, construction, and energy management knowledge
Getting Started with Solar DIY
Starting with DIY solar projects means learning about key components and safety. It’s not hard. You can make simple chargers or big home systems with the right tools and knowledge.
DIY solar projects are a great way to live sustainably and save money. They’re perfect for powering small homes or adding green energy to your house. Knowing the basics is key to success.
Essential Solar Terminology for Beginners
The solar world has its own language. Let’s break down these terms to help you feel more confident in your projects.
The photovoltaic effect is how solar panels turn sunlight into electricity. This science is what makes solar power work. When sunlight hits the silicon cells, it creates electricity you can use.
A charge controller manages the power from your panels to your batteries. It keeps your batteries from getting too full. PWM controllers are good for beginners, while MPPT controllers are better for bigger systems.
“Understanding the relationship between your charge controller and battery bank is perhaps the most critical aspect of designing a reliable DIY solar system. This connection determines how efficiently you store the energy you capture.”
Inverters change the DC power from panels to AC power for your appliances. Without an inverter, you can only use DC devices.
Your battery bank stores energy for when the sun isn’t out. Most people start with lead-acid batteries. But lithium-ion batteries work better but cost more. The size of your battery bank decides how long you can use power when it’s dark or cloudy.

Basic Tools for Solar Projects
You don’t need to spend a lot to start your solar toolkit. A basic set costs $150-300 and will help with many projects. Here’s what you’ll need:
- Multimeter ($25-50): Essential for measuring voltage, current, and continuity in your circuits
- Wire strippers and crimpers ($15-30): For preparing and connecting wires safely
- Screwdriver set ($20-40): Both flathead and Phillips in various sizes
- Socket wrench set ($30-60): For mounting hardware and battery terminals
- MC4 connector tools ($15-25): Specialized tools for working with solar panel connections
- Battery terminal cleaner ($5-10): Keeps connections efficient and prevents power loss
- Insulated gloves ($15-30): Protection when working with electrical components
- Cable ties and organizers ($10-20): For clean, professional installations
For more complex projects, add a drill, angle grinder, and soldering iron to your tools. These help with custom mounts and special connections.
Understanding Solar Panel Specifications
Solar panel datasheets have important info for your system’s performance. Learning to read these specs helps you choose the right panels.
The power rating, in watts (W), shows the panel’s maximum output. Panels for homes usually range from 250W to 400W. Higher wattage panels need less space but cost more.
Efficiency percentage shows how well a panel turns sunlight into electricity. Modern panels are 15% to 22% efficient. Higher efficiency panels cost more but use less space.
| Panel Type | Typical Efficiency | Cost Factor | Best Application |
|---|---|---|---|
| Monocrystalline | 18-22% | Highest | Limited space, premium installations |
| Polycrystalline | 15-17% | Medium | Budget-conscious projects |
| Thin Film | 10-12% | Lowest | Flexible applications, portable systems |
Look at the temperature coefficient to see how panels perform in heat. A lower coefficient means better performance in warm weather.
Physical dimensions and weight are important for mounting. Standard panels are about 65″ x 39″ and weigh 40-50 pounds. Make sure your roof can handle the weight of your panels.
Safety Considerations for DIY Solar
Working with electricity is serious. Follow safety rules to protect yourself and your project.
Proper grounding is crucial. It prevents shocks and protects your system from lightning and power surges. Always follow local electrical codes for grounding.
Use insulated tools when working with live circuits. These tools have coatings that prevent electrical current from reaching you.
Never work alone on electrical projects. Having someone nearby can save your life. Also, always disconnect power before making or breaking connections.
Know your limits and when to call a professional. While DIY solar is fun, some tasks are best left to experts. This includes main electrical panels or grid connections.
“The most successful DIY solar enthusiasts aren’t those who never make mistakes—they’re the ones who prioritize safety so they can learn from those mistakes without serious consequences.”
Battery backup solutions need special care. Lead-acid batteries can release hydrogen gas, which is dangerous. Always install them in well-ventilated areas and follow the manufacturer’s guidelines.
With these basics, you’re ready to start your solar DIY journey. Begin with simple projects, build your confidence, and move on to more complex ones. The joy of making your own power makes learning worth it.
Small-Scale Solar Charging Projects
Starting with small-scale solar charging projects is a great way to get into renewable energy without spending a lot. These beginner-friendly projects give you hands-on experience with solar power systems. You can make useful devices that use the sun’s energy in just a few hours.
These projects are perfect for learning the basics of solar power. They help you understand how photovoltaic cells work and basic electrical concepts. This knowledge is essential for more complex projects later on.
Portable USB Solar Phone Charger
Making a portable solar phone charger is a simple yet useful project. It’s great for keeping your devices charged during outdoor activities or emergencies. You’ll need a few basic materials and some time to put it together.
The charger uses a solar panel to turn sunlight into electricity. A charge controller makes sure the voltage is safe for your devices. With about 2-3 hours of work, you can make a charger that works well for smartphones and small USB devices.

This project is easy to do and very useful. On a sunny day, it can fully charge a smartphone in 2-4 hours. Adding a small lithium battery makes it even more useful, storing energy for later.
Solar-Powered Battery Bank Construction
Ready for something bigger? A solar-powered battery bank stores a lot of energy for many devices. It’s a great backup power system.
This project needs more parts but offers more power. You can store between 100Wh to 500Wh of energy. This is enough to charge laptops, run small appliances, or power LED lights for a long time.
You’ll need:
– 20W-50W solar panel ($30-80)
– Charge controller with battery protection ($20-40)
– Lithium-ion or LiFePO4 batteries ($50-150 depending on capacity)
– Weatherproof enclosure ($15-30)
– Inverter for AC power (optional, $25-50)
LiFePO4 batteries are safer and last longer, but they cost more. They’re a good choice for renewable energy systems because they last for thousands of charges.
Building the battery bank takes about 3-4 hours. Most of the time is spent on wiring and mounting. The finished bank can power devices for days, depending on the battery size and how much you use it.
DIY Solar Backpack for Outdoor Adventures
A solar backpack is perfect for hikers, campers, and outdoor lovers. It turns your backpack into a mobile charging station.
Flexible solar panels are key to this project. They’re lightweight, bendable, and durable. They fit well on backpacks and can handle outdoor use.
To make your solar backpack, you’ll need:
– Flexible solar panel (5W-10W, $50-80)
– Small charge controller ($10-15)
– USB connection ports ($5-10)
– Weatherproof wire connectors ($5)
– Strong adhesive or sewing supplies
Installing the backpack takes about 2 hours. Place the panel on the top flap or rear of your backpack for the best sunlight. Hide the wires inside the bag to connect to the charge controller and USB ports.
While hiking or camping, your backpack charges devices continuously. This project shows how renewable energy can improve outdoor experiences and reduce battery waste.
Window-Mounted Small Device Charger
Don’t have outdoor space? No worries! A window-mounted solar charger brings solar power into apartments and small spaces. It uses suction cups to stick to sunny windows.
This project is great for city dwellers who want to try solar power without big installations. It charges phones, tablets, or small electronics. It also teaches you about solar energy in a visible way.
For this project, you’ll need:
– 5W-10W solar panel ($15-25)
– Strong suction cups with hooks ($5-10)
– USB charge controller ($10-15)
– Clear silicone wire ($5)
– Small shelf or platform for devices (optional, $10)
Setting it up takes only 1-2 hours. The most important thing is to place it in a sunny window. Even with less sunlight, it can still charge small devices.
| Project | Cost Range | Build Time | Power Output | Best For |
|---|---|---|---|---|
| Portable USB Charger | $30-50 | 2-3 hours | 5W-10W | Smartphones, small USB devices |
| Battery Bank | $100-300 | 3-4 hours | 20W-50W with 100-500Wh storage | Multiple devices, small appliances |
| Solar Backpack | $65-110 | 2 hours | 5W-10W | Hikers, outdoor enthusiasts |
| Window Charger | $35-65 | 1-2 hours | 5W-10W | Apartment dwellers, urban spaces |
These small projects show that renewable energy is accessible to everyone. They’re a great way to start your solar journey. Each project builds your confidence and knowledge, helping you tackle bigger projects and reduce your carbon footprint.
Home Solar Lighting Solutions
Solar-powered lighting systems are great DIY projects for those wanting to live sustainably. They are easy to do and save money on energy. You can light up your home and garden without using much electricity.
Solar lighting is versatile and can grow with you. Start with simple lights and add more as you get better. These projects can save you money in just a few years, making them a smart choice for your home.
Solar Garden Path Lighting Installation
Make your garden paths safe and pretty with solar lights. They turn on at night and don’t need any wires or electricity.
To set up solar path lights, first map out your garden. Choose spots that get at least 6 hours of sun a day. Place lights 6-8 feet apart for even lighting.

- High-efficiency LED bulbs for maximum brightness
- Weather-resistant housing (minimum IP65 rating)
- Replaceable batteries for extended lifespan
- Auto on/off sensors to conserve energy
A set of 8-10 good solar path lights costs $50-100. Many people save money on wiring and lighting costs right away.
DIY Solar Emergency Light System
Power outages can be scary. A DIY solar emergency lighting system keeps your home lit and safe. It’s also good for the planet.
To make a strong emergency light system, you need solar panels, a battery, and LED lights. For up to 72 hours of light, you’ll need:
- A 20-30 watt solar panel ($30-50)
- Deep-cycle 12V battery with at least 20Ah capacity ($40-60)
- Charge controller to prevent battery damage ($15-25)
- 4-6 LED light fixtures with switches ($20-40)
Put your solar panel in the sunniest spot, facing south. Connect it to your charge controller, then to your battery. Wire your LED lights to the battery for control.
This system costs about $75-150. It’s better than gas generators or candles because it’s quiet, has no fumes, and uses sunlight.
Solar-Powered Motion Security Lights
Boost your home’s security with solar motion lights. They turn on when someone approaches. They save energy and are easy to use.
Look at your home’s weak spots for lights. Most homes need 3-5 lights for good coverage.
When installing solar security lights:
- Position solar panels to receive at least 5 hours of direct sunlight
- Mount motion sensors 7-9 feet high for optimal detection range
- Adjust sensitivity settings to prevent false triggers from small animals
- Angle light heads to illuminate approach paths rather than simply flooding walls
Good solar motion lights cost $30-60 each. They light up to 30-40 feet and have adjustable settings.
Homeowners save money on security lighting and feel safer. It’s a win-win.
Indoor Solar Light Tubes
Bring natural light into dark rooms with solar light tubes. They use sunlight to light up your home without electricity. This improves your mood and saves on lighting costs.
Solar tubes have three parts: a rooftop dome, a reflective tube, and a ceiling diffuser. They’re better than skylights because they need little setup and can be installed quickly.
DIY solar tubes cost $200-300 each. The process involves:
- Locating an installation point with clear roof access
- Creating a small (10-14 inch) opening in your roof and ceiling
- Installing flashing and weatherproofing around the dome
- Assembling the reflective tube between roof and ceiling
- Mounting the interior diffuser for optimal light distribution
These tubes save energy and make rooms brighter. They’re a key part of a green home.
| Solar Lighting Solution | Average Cost | Installation Difficulty | Annual Savings | Payback Period |
|---|---|---|---|---|
| Garden Path Lighting (8-10 lights) | $50-100 | Easy (1-2 hours) | $30-60 | 1-2 years |
| Emergency Light System | $75-150 | Moderate (3-5 hours) | $40-80 + emergency readiness | 1-3 years |
| Motion Security Lights (3-5 units) | $90-300 | Easy-Moderate (2-4 hours) | $50-120 | 1-3 years |
| Indoor Solar Light Tubes (per tube) | $200-300 (DIY) | Challenging (6-8 hours) | $60-150 per tube | 2-3 years |
By using solar lighting, you help the planet and make your home safer. Start with what you need and grow your solar setup as you learn more.
Solar-Powered Garden Projects
Creating solar-powered features for your garden is fun and practical. It makes your outdoor spaces more beautiful and functional. You’ll improve plant health and save on utility costs. Plus, you’ll move closer to living off the grid.

Solar Water Fountain Construction
A solar water fountain brings peace to your garden. It shows how renewable energy works. These fountains run without electricity, using sunlight to move water.
To make your own solar fountain, you’ll need:
- A submersible water pump (sized according to your desired water flow)
- A solar panel (10-20W for small fountains, 30-50W for larger displays)
- Waterproof wire connectors
- Fountain basin or container
- Decorative elements (rocks, statuary, etc.)
A simple tabletop fountain costs $50-75. It uses a 10W panel and a small pump. For bigger displays, spend $150-250 on a 30-50W panel and a bigger pump.Pro tip: Add a small battery to keep your fountain running at night or on cloudy days.
Automated Solar Garden Irrigation
An automated solar irrigation system waters your plants just right. It saves water and keeps your garden healthy, even when you’re not there.
The key parts are:
- Solar panel (20-30W)
- 12V water pump
- Charge controller
- Battery for overnight operation
- Soil moisture sensors
- Drip irrigation components
Moisture sensors help water plants only when needed. This saves water and prevents overwatering.
Expect to spend $100-200 on materials. This system saves water and improves plant health, making it a smart investment.
Solar-Powered Greenhouse Ventilation
Good ventilation is key for greenhouses. Solar-powered systems keep your greenhouse cool without using grid electricity.
Your project can include:
1.Automatic vent openers– These devices open and close vents based on temperature, without electricity.
2.Solar-powered circulation fans– Small fans run on a 10-30W solar panel during the day.
For more control, add a battery and temperature controller. This costs $150-300, depending on your greenhouse’s size and needs.
Solar ventilation improves growing conditions. It reduces plant stress and extends the growing season.
DIY Solar Pond Aerator
A healthy pond needs oxygen, which drops in warm weather. A solar pond aerator keeps water quality high, preventing algae and supporting fish and microorganisms.
Building a solar aerator is easy:
- 5-20W solar panel (sized to pond volume)
- DC air pump designed for continuous operation
- Air tubing and diffuser stones
- Optional battery for overnight operation
- Simple mounting system for the panel
A 5W panel works for ponds up to 1,000 gallons. Larger ponds need 10-20W systems. The whole setup costs $75-150.
For nighttime use, add a 7Ah battery. It powers most aerators through the night, making your pond aerated 24/7.
These projects help you become more energy independent. They make your garden more vibrant and sustainable. You’ll gain skills for bigger solar projects, reducing your need for grid power.
Intermediate Off-Grid Solar Solutions
Intermediate off-grid solar solutions are a big step in your journey to renewable energy. They power entire spaces without needing utility connections. These projects need more planning and money than basic solar setups but offer a lot of independence and satisfaction.
These systems are great alternative energy solutions for places where grid connection is not needed. They’re perfect for powering a vacation cabin, workshop, or a portable power station for weekend trips. These projects use renewable energy technology that can be tailored to your needs.
Small Cabin Solar Power Setup
A cabin solar system gives reliable power for weekend getaways or seasonal living. It doesn’t need expensive utility lines. A typical system is 500W to 1kW and costs $1,500-$3,000, based on your needs and component quality.
First, figure out how much power you need. A small cabin might need power for:
- LED lighting (10-20W total)
- Small refrigerator (40-100W)
- Water pump (200-400W when running)
- Entertainment devices (50-150W)
- Occasional power tools or appliances
For a weekend cabin, a system with four 250W panels, a 2000W inverter, and 200Ah of battery storage is a good start. This setup makes about 4-6 kWh daily in summer and 2-3 kWh in winter, enough for basic needs with careful use.

Setting up a cabin system takes about three weekends. First, mount panels and do initial wiring. Second, set up batteries and charge controllers. Third, connect the inverter and test the system. Many cabin owners get 80-100% energy independence, cutting out monthly utility bills.
Solar Workshop Power System
Workshops need special solar power because of high startup loads on equipment. Tools like table saws and air compressors need 3-4 times their running wattage to start, so systems need to be strong.
A workshop solar system is usually 1-2kW and costs $2,000-$4,000. It includes:
- 6-8 solar panels (320W each)
- Heavy-duty pure sine wave inverter (2000-3000W)
- Expanded battery bank (300-400Ah)
- Oversized charge controller with 25% capacity buffer
When designing your workshop system, focus on inverter quality. Cheap modified sine wave inverters can damage electronics and make motors run hot. A pure sine wave inverter rated at least 25% above your highest expected load ensures reliable performance and equipment longevity.
Workshop owners say they can run most woodworking and metalworking tools without problems. A recent Sustainable Home Magazine survey found that workshop owners with solar systems save $75-125 monthly on utility costs and keep working during grid outages.
Garage/Shed Independent Solar System
Garages and sheds are great for solar independence. They need less power than workshops but still benefit from their own energy source. A system between 300-800W costing $800-$2,000 gives enough power for lighting, security systems, and occasional tool use.
The beauty of garage/shed systems is their flexibility. You can start small with a basic DC-only system for lighting and then add AC power for more demanding needs. This modular approach lets you invest over time while enjoying immediate benefits.
A standard garage solar setup includes:
- 2-3 solar panels (150-300W total)
- 30-60A charge controller
- 100-200Ah battery bank
- 1000W inverter (optional for AC needs)
Many garage system owners add simple eco-friendly projects like motion-activated lighting and automated ventilation fans. These additions improve functionality and show the versatility of small independent solar systems. With the right components, these systems usually need maintenance only once or twice a year.
Weekend Camping Solar Kit Build
For outdoor lovers, a portable solar power station offers comfort and convenience without the noise and fuel of traditional generators. A camping solar kit is usually 100-300W and costs $400-$800, offering impressive capability in a small package.
The ideal camping solar system balances power with portability. Key considerations include:
- Foldable or flexible solar panels for easy transport
- Lightweight lithium batteries instead of heavier lead-acid
- Weatherproof connection points and controllers
- Multiple output options (USB, 12V DC, and 120V AC)
A well-designed 200W system can power LED lighting, device charging, a small cooler, and even CPAP machines for medical needs. The system fits into two manageable cases: one for panels and one for batteries and electronics.
Weatherproofing is crucial for camping systems. Use waterproof quick-connect plugs, and keep control components in sealed enclosures. This ensures reliability even in unexpected weather changes.
Campers say these systems pay for themselves in 1-2 seasons compared to disposable battery costs and generator fuel. They offer financial benefits and preserve the natural camping experience with modern conveniences powered by renewable energy.
Each of these intermediate solar projects is a practical step toward energy independence. By defining your needs and choosing the right components, you can create reliable off-grid power systems. These projects are rewarding and practical, making your spaces run on clean, renewable energy.
DIY Solar Water Heating
DIY solar water heating systems are a great way to start using renewable energy. They can cut down your utility bills and reduce your carbon footprint. Unlike complex electrical systems, solar thermal projects are simpler and give you quick results.
Hot water is a big part of our energy use, making these projects very cost-effective. They’re a key step toward living off the grid.
Solar water heating is simple and efficient. Even in moderate climates, it can provide 50-80% of your hot water needs all year. Let’s look at four DIY projects that use the sun’s heat to warm water for different uses in your home.
Batch Solar Water Heater Construction
A batch solar water heater is the simplest form of solar water heating. It’s perfect for DIY fans with basic skills. This design combines the solar collector and storage tank into one unit.
The key part is a black tank in an insulated box with a glazed front. Water gets hot as it absorbs solar energy. The system works by hot water rising and cold water sinking.
- A 30-55 gallon tank (recycled water heater tanks work well)
- Copper or PEX piping for inlet and outlet
- Insulation board (minimum R-10 value)
- Tempered glass or polycarbonate glazing
- Flat black high-temperature paint
- Weather-resistant enclosure materials
The cost is usually $200-350, much less than commercial systems. In good conditions, these heaters can warm water by 30-50°F on sunny days. Mount them on a south-facing wall or roof at an angle equal to your latitude plus 10-15 degrees.
“Batch solar water heaters offer the best performance-to-simplicity ratio of any renewable energy system. They’re the perfect starting point for anyone interested in sustainable living.”
Passive Solar Water Pre-Heating System
If you don’t want to replace your water heater, a pre-heating system is a good choice. It warms water before it goes into your conventional heater, saving energy.
This setup uses a thermosiphon collector system with a separate tank. Water moves naturally between the collector and tank without pumps. It’s passive and great for off-the-grid living.
A well-designed pre-heating system can cut your conventional water heating energy by 40-60%. The initial cost of $300-600 can pay off in 2-4 years through energy savings.
When designing, size the collector area based on your household needs. For a family of four using 60 gallons daily, you’ll need 60-90 square feet of collector area.
Solar Shower Design for Outdoor Use
Solar showers are a quick and rewarding DIY project. They’re great for outdoor lovers, off-grid cabins, or as a backup during power outages.
The simplest design is a black container filled with water left in the sun. More advanced versions add insulation, temperature mixing valves, and privacy enclosures. Here are two practical approaches:
Portable Camping Shower ($50-100):
- 5-10 gallon black solar shower bag
- Mounting hook or pole system
- Simple shower head attachment
- Optional insulated cover to retain heat
Permanent Outdoor Installation ($200-400):
- 55-gallon food-grade plastic drum painted black
- Elevated platform (6-8 feet high)
- Copper or PEX plumbing with mixing valve
- Shower enclosure using weather-resistant materials
- Optional transparent roof panel for additional heating
For the best results, place your solar shower to get at least 6 hours of direct sunlight. On sunny summer days, water can get up to 100-120°F. This is perfect for a refreshing outdoor shower without using any conventional energy.
Swimming Pool Solar Heating Panels
Heating a swimming pool uses a lot of energy, making it a great candidate for solar technology. DIY solar pool heating can extend your swimming season by 1-3 months and save on heating costs.
The most cost-effective DIY method uses black irrigation tubing in a grid pattern. Water from your pool circulates through these sun-warmed tubes before returning to the pool at a higher temperature. Your existing pool pump provides the circulation, eliminating the need for additional battery storage systems or complex controls.
For the best performance, your solar collector area should be 50-100% of your pool’s surface area. A 16×32 foot pool (512 square feet) would need 250-500 square feet of collector area for effective heating.
| Solar Pool Heating Option | Materials Cost | DIY Difficulty | Temperature Gain | Lifespan |
|---|---|---|---|---|
| Black Irrigation Tubing Grid | $3-4 per sq ft | Moderate | 5-8°F | 5-8 years |
| EPDM Rubber Mat System | $4-5 per sq ft | Easy | 7-10°F | 7-10 years |
| PEX Tubing in Aluminum Frame | $5-7 per sq ft | Advanced | 8-12°F | 10-15 years |
| Commercial System (for comparison) | $15-25 per sq ft | Professional Install | 10-15°F | 15-20 years |
Unlike complex grid-tie systems that need professional installation, DIY pool heating can be built and installed over a weekend. The materials cost about $3-5 per square foot, much less than commercial systems. This is an 80% savings for similar performance.
In colder climates, consider combining your solar pool heater with a small conventional heater. The solar system does most of the work, and the conventional heater adds heat only when needed. This dramatically cuts down on operating costs.
When winterizing your solar water heating systems, drain all outdoor parts in freezing climates. Most DIY systems can’t handle frozen water expansion. In milder areas, just covering collectors during winter might be enough.
Looking to lower your utility bills, enhance your off-the-grid living setup, or just enjoy using renewable energy? Solar water heating projects offer great value. Unlike complex electrical systems, these thermal projects are easy to start with and give you quick, real benefits.
Advanced DIY Solar Projects
Are you ready to take your solar journey to the next level? These advanced projects are the top of the line for serious DIYers. With careful planning and execution, you can become fully energy independent. Plus, you’ll be ready for grid outages.
Grid-Tied Solar System Basics
A grid-tie system lets you connect your solar array to the utility grid. This way, you can sell extra power back to your utility company. These systems cost $1.50-2.50 per watt if you install them yourself. But, professional installation costs $2.50-3.50 per watt.
Most places need permits and a certified electrician for the final connection.
Solar Generator Construction Guide
Make your own portable power station with 1-3kWh capacity for about $800-2,500. It will have solar panels, charge controllers, inverters, and batteries. It’s great for emergencies or when you need power in remote areas.
Building Solar Panel Mounts and Trackers
Custom mounts can boost energy production by 15-40% over standard setups. Fixed mounts are good for most homes. But, tracking systems that follow the sun’s path are best for off-the-grid living.
DIY Battery Storage Systems
Creating safe home battery systems needs careful planning. LiFePO4 batteries are the safest and most efficient for about $500-1,000 per kWh. Make sure to have good ventilation, temperature control, and a battery management system for safety and longevity.
Building these advanced solar projects saves money and joins a community of energy-independent homeowners. They embrace sustainable living with renewable energy systems. Check out Sustainable Home Magazine for more guides and support.
FAQ
Q: How much money can I save with DIY solar projects?
A: DIY solar projects can save you a lot of money. Small projects like solar chargers can save -10 a month. Larger installations can cut your electricity bill by 60-100% for specific areas.
A complete home system can pay for itself in 7-10 years. It lasts 25+ years. DIY installation costs
FAQ
Q: How much money can I save with DIY solar projects?
A: DIY solar projects can save you a lot of money. Small projects like solar chargers can save $5-10 a month. Larger installations can cut your electricity bill by 60-100% for specific areas.
A complete home system can pay for itself in 7-10 years. It lasts 25+ years. DIY installation costs $1.50-2.50 per watt, saving 30-40% compared to professional installation.
Q: Do I need special skills to build my own solar projects?
A: Many solar projects need only basic DIY skills. Small projects like USB chargers or garden lights are easy to do in 2-4 hours. They require little technical knowledge.
Intermediate projects need basic electrical knowledge and tool familiarity. Advanced systems like grid-tied installations require more technical skills. Some parts may need a licensed electrician. We provide detailed instructions and safety guidelines for all skill levels.
Q: What tools do I need to get started with solar DIY?
A: A basic solar DIY toolkit costs $150-300. It includes wire cutters, crimping tools, screwdrivers, and a drill. You’ll also need a multimeter, MC4 connector tools, and basic hand tools.
For advanced projects, you might need a soldering iron, heat gun, and specialized mounting hardware. Many beginners start with the essentials and add more tools as they tackle more complex projects.
Q: How do I know what size solar system I need?
A: To find the right system size, list all devices you want to power. Note their wattage and daily usage hours. For example, a small cabin might need 500W-1kW for essentials.
Workshop systems might need 1-2kW for power tools. Climate and sunlight in your area also affect sizing. Northern locations need 20-30% more capacity than southern ones for the same output.
Q: Can I install solar panels myself without professional help?
A: Yes, you can install many solar systems yourself, like small to medium-sized off-grid systems. But grid-tied systems often need permits and inspections. Many places require a licensed electrician for the final connection.
DIY installation can save 30-40% on costs. Always check local building codes and regulations before starting. For roof installations, consider your comfort with heights and structural work.
Q: What’s the difference between off-grid and grid-tied solar systems?
A: Off-grid systems work independently and need battery storage for power when the sun isn’t out. They offer complete energy independence but require careful sizing. Grid-tied systems connect to the utility grid, allowing you to draw power when needed and potentially sell excess back.
Grid-tied systems are less expensive as they don’t need batteries. But they won’t provide power during grid outages unless you add battery backup.
Q: How long do DIY solar projects typically last?
A: Quality solar panels last 25-30 years, though their efficiency decreases over time. Batteries have shorter lifespans: lead-acid batteries last 3-7 years, while lithium-based ones can last 10-15 years with proper care. Inverters typically need replacement after 10-15 years.
Small DIY projects using consumer-grade components may have shorter lifespans. But most well-built solar projects provide excellent return on investment through their long operational life.
Q: What are the most common mistakes in DIY solar installations?
A: Common mistakes include undersizing battery storage, using improper wire gauges, and poor panel placement. These can reduce energy production by 20-30%. Inadequate weatherproofing and mismatched components also cause issues.
Always research thoroughly, create detailed plans before purchasing components, and prioritize safety. Use proper fusing, grounding, and quality connections.
Q: How effective are DIY solar water heaters compared to commercial systems?
A: DIY solar water heaters can be very effective, often matching 70-90% of commercial system performance at 20-30% of the cost. A well-built batch heater or pre-heating system can reduce water heating energy by 40-60% in most climates.
DIY pool heating panels cost $3-5 per square foot, compared to $15-25 for commercial solutions. They provide similar temperature increases of 10-15°F during sunny conditions. The main differences are in aesthetics, warranty coverage, and installation time rather than performance.
Q: What maintenance do solar systems require?
A: Solar systems require minimal maintenance. Panels need occasional cleaning (2-4 times yearly) to remove dust and debris. More frequent cleaning is needed in dusty areas.
Battery-based systems require regular monitoring of charge levels and periodic inspection of connections. Lead-acid batteries need electrolyte level checks every 1-3 months. Inspect wiring and mounting hardware annually for signs of wear or damage. Most electronic components like charge controllers and inverters are maintenance-free but should be kept clean and well-ventilated.
Q: Can I run air conditioning on a DIY solar system?
A: Yes, but air conditioning requires a lot of power. A typical window AC unit (5,000-10,000 BTU) draws 500-900W while running and needs 1,500-2,500W for startup. For reliable AC operation, you’ll need at least a 2kW inverter and 3-5kW of solar panels, plus 5-10kWh of battery storage for overnight use.
Consider energy-efficient mini-split systems that use 30-50% less electricity than traditional units. Alternative cooling approaches like solar attic fans or DIY evaporative coolers can be more practical for modest solar systems.
Q: What permits might I need for DIY solar installations?
A: Permit requirements vary by location. Small off-grid systems (under 1kW) typically don’t require permits if they’re not permanently installed on structures. Larger systems, like roof-mounted or grid-tied installations, generally require building permits and electrical permits.
Grid-tied systems always require utility approval and often need professional certification. Some jurisdictions offer streamlined permitting for solar. Check with your local building department and utility company before starting any permanent installation. Permit costs typically range from $200-500 depending on location and system size.
Q: How do I protect my solar equipment from extreme weather?
A: To protect against extreme weather: mount panels to withstand local wind ratings (typically 120-140 mph for quality mounts). Use weatherproof enclosures rated for outdoor use (minimum IP65 rating) for electronics. Install proper grounding and lightning protection.
Ensure all connections use waterproof cable glands or junction boxes. Consider snow load ratings for roof installations (typically 20-50 lbs/sq ft depending on location). In hurricane-prone areas, design systems with removable panels or extra reinforcement. For extreme cold, insulate battery enclosures as battery capacity can drop by 30-50% in sub-freezing temperatures.
.50-2.50 per watt, saving 30-40% compared to professional installation.
Q: Do I need special skills to build my own solar projects?
A: Many solar projects need only basic DIY skills. Small projects like USB chargers or garden lights are easy to do in 2-4 hours. They require little technical knowledge.
Intermediate projects need basic electrical knowledge and tool familiarity. Advanced systems like grid-tied installations require more technical skills. Some parts may need a licensed electrician. We provide detailed instructions and safety guidelines for all skill levels.
Q: What tools do I need to get started with solar DIY?
A: A basic solar DIY toolkit costs 0-300. It includes wire cutters, crimping tools, screwdrivers, and a drill. You’ll also need a multimeter, MC4 connector tools, and basic hand tools.
For advanced projects, you might need a soldering iron, heat gun, and specialized mounting hardware. Many beginners start with the essentials and add more tools as they tackle more complex projects.
Q: How do I know what size solar system I need?
A: To find the right system size, list all devices you want to power. Note their wattage and daily usage hours. For example, a small cabin might need 500W-1kW for essentials.
Workshop systems might need 1-2kW for power tools. Climate and sunlight in your area also affect sizing. Northern locations need 20-30% more capacity than southern ones for the same output.
Q: Can I install solar panels myself without professional help?
A: Yes, you can install many solar systems yourself, like small to medium-sized off-grid systems. But grid-tied systems often need permits and inspections. Many places require a licensed electrician for the final connection.
DIY installation can save 30-40% on costs. Always check local building codes and regulations before starting. For roof installations, consider your comfort with heights and structural work.
Q: What’s the difference between off-grid and grid-tied solar systems?
A: Off-grid systems work independently and need battery storage for power when the sun isn’t out. They offer complete energy independence but require careful sizing. Grid-tied systems connect to the utility grid, allowing you to draw power when needed and potentially sell excess back.
Grid-tied systems are less expensive as they don’t need batteries. But they won’t provide power during grid outages unless you add battery backup.
Q: How long do DIY solar projects typically last?
A: Quality solar panels last 25-30 years, though their efficiency decreases over time. Batteries have shorter lifespans: lead-acid batteries last 3-7 years, while lithium-based ones can last 10-15 years with proper care. Inverters typically need replacement after 10-15 years.
Small DIY projects using consumer-grade components may have shorter lifespans. But most well-built solar projects provide excellent return on investment through their long operational life.
Q: What are the most common mistakes in DIY solar installations?
A: Common mistakes include undersizing battery storage, using improper wire gauges, and poor panel placement. These can reduce energy production by 20-30%. Inadequate weatherproofing and mismatched components also cause issues.
Always research thoroughly, create detailed plans before purchasing components, and prioritize safety. Use proper fusing, grounding, and quality connections.
Q: How effective are DIY solar water heaters compared to commercial systems?
A: DIY solar water heaters can be very effective, often matching 70-90% of commercial system performance at 20-30% of the cost. A well-built batch heater or pre-heating system can reduce water heating energy by 40-60% in most climates.
DIY pool heating panels cost -5 per square foot, compared to -25 for commercial solutions. They provide similar temperature increases of 10-15°F during sunny conditions. The main differences are in aesthetics, warranty coverage, and installation time rather than performance.
Q: What maintenance do solar systems require?
A: Solar systems require minimal maintenance. Panels need occasional cleaning (2-4 times yearly) to remove dust and debris. More frequent cleaning is needed in dusty areas.
Battery-based systems require regular monitoring of charge levels and periodic inspection of connections. Lead-acid batteries need electrolyte level checks every 1-3 months. Inspect wiring and mounting hardware annually for signs of wear or damage. Most electronic components like charge controllers and inverters are maintenance-free but should be kept clean and well-ventilated.
Q: Can I run air conditioning on a DIY solar system?
A: Yes, but air conditioning requires a lot of power. A typical window AC unit (5,000-10,000 BTU) draws 500-900W while running and needs 1,500-2,500W for startup. For reliable AC operation, you’ll need at least a 2kW inverter and 3-5kW of solar panels, plus 5-10kWh of battery storage for overnight use.
Consider energy-efficient mini-split systems that use 30-50% less electricity than traditional units. Alternative cooling approaches like solar attic fans or DIY evaporative coolers can be more practical for modest solar systems.
Q: What permits might I need for DIY solar installations?
A: Permit requirements vary by location. Small off-grid systems (under 1kW) typically don’t require permits if they’re not permanently installed on structures. Larger systems, like roof-mounted or grid-tied installations, generally require building permits and electrical permits.
Grid-tied systems always require utility approval and often need professional certification. Some jurisdictions offer streamlined permitting for solar. Check with your local building department and utility company before starting any permanent installation. Permit costs typically range from 0-500 depending on location and system size.
Q: How do I protect my solar equipment from extreme weather?
A: To protect against extreme weather: mount panels to withstand local wind ratings (typically 120-140 mph for quality mounts). Use weatherproof enclosures rated for outdoor use (minimum IP65 rating) for electronics. Install proper grounding and lightning protection.
Ensure all connections use waterproof cable glands or junction boxes. Consider snow load ratings for roof installations (typically 20-50 lbs/sq ft depending on location). In hurricane-prone areas, design systems with removable panels or extra reinforcement. For extreme cold, insulate battery enclosures as battery capacity can drop by 30-50% in sub-freezing temperatures.

